MailChimp is an email marketing platform which is very popular and widely accepted from small businesses to enterprises. Here in this tutorial, I am going to show you how to do MailChimp API integration in PHP. This tutorial will work on current MailChimp API Version 3.0.
So, let’s start.
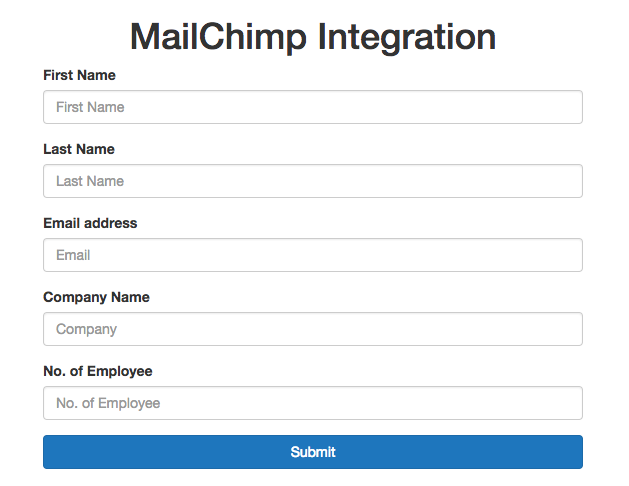
Create the Form

At first, we will create the form, from which users can submit their details and it will go directly in the MailChimp list (or audience for newly created MailChimp accounts). So this is will be simple HTML form elements with bootstrap classes.
<div class="col-sm-6 col-sm-offset-3">
            <h1 class="text-center">MailChimp Integration</h1>
            <form method="POST" action="form-submit.php">
                <div class="form-group">
                    <label for="fname">First Name</label>
                    <input type="text" class="form-control" name="fname" id="fname" placeholder="First Name">
                </div>
                <div class="form-group">
                    <label for="lname">Last Name</label>
                    <input type="text" class="form-control" name="lname" id="lname" placeholder="Last Name">
                </div>
                <div class="form-group">
                  <label for="email">Email address</label>
                  <input type="email" class="form-control" name="email" id="email" placeholder="Email">
                </div>
                <div class="form-group">
                  <label for="company">Company Name</label>
                  <input type="text" class="form-control" name="company" id="company" placeholder="Company">
                </div>
                <div class="form-group">
                  <label for="no_of_employee">No. of Employee</label>
                  <input type="text" class="form-control" name="no_of_employee" id="no_of_employee" placeholder="No. of Employee">
                </div>

                <button type="submit" class="btn btn-primary btn-block">Submit</button>
              </form>
        </div>
So the form is getting posted to form-submit.php file. Now we will create the file in the same directory in which this HTML file will be.
Submit the Form in PHP
if($_POST) {
    $fname = $_POST['fname'];
    $lname = $_POST['lname'];
    $email = $_POST['email'];
    $company = $_POST['company'];
    $employee = $_POST['no_of_employee'];

    echo $fname . ' ' . $lname;
    echo $email;
}
First, we are checking if the file is getting a post request. If it is true, then assign every input field value in respective PHP variables. And to see if our form and PHP is working as it should be I have made few echo statements.
MailChimp API V 3.0 Integration
In this stage, we will now actually work on integration. For this, I am going to use a MailChimp API library from GitHub. Now I created another directory called /lib/ within our project directory and within this directory, I have placed the MailChimp.php file, which I got from the above mentioned library.
Now in our form-submit.php file, we need to include it and do other necessary coding.
<?php
include 'lib/MailChimp.php';

use \DrewM\MailChimp\MailChimp;

$api_key = 'your-api-key-will-be-here';
$list_id = 'your-list-id-will-be-here';

$MailChimp = new MailChimp($api_key);

if($_POST) {
    $fname = $_POST['fname'];
    $lname = $_POST['lname'];
    $email = $_POST['email'];
    $company = $_POST['company'];
    $employee = $_POST['no_of_employee'];

    $result = $MailChimp->post("lists/$list_id/members", [
                    'email_address' => $email,
                    'merge_fields' => ['FNAME'=>$fname, 'LNAME'=>$lname, 'COMPANY'=>$company, 'EMPLOYEES'=>$employee],
                    'status'        => 'subscribed',
                ]);

    if ($MailChimp->success()) {
        //print_r($result);
        echo '<h2>Submitted Successfully.</h2>';
    } else {
        echo $MailChimp->getLastError();
    }
}

?>
In line 6 & 7, you need to provide your API key and List/Audience ID respectively. To see how you can find the API key & list ID see my tutorial video at the end of this tutorial.
In line 20, I have specified merge fields which are custom user data. To create custom data fields in MailChimp go to your list, then go to settings -> List fields & *|MERGE|* tags and create fields as per your requirement. For more details see the video tutorial mentioned below.

Later in the code, we are checking MailChimp response and if we get success then we can print our custom success message to the user, otherwise the error message.
So, this is it. Hope this tutorial helps you. If you face any difficulties in the process let me know by commenting down below.
And before ending the tutorial here is my video representation of this tutorial.

Not working in my website.After pressing submit button it is showing HTTP ERROR 405
email needs to be submitted as MD5 hash. Google to find out how.
Can this be integrated in wordpress? In that case how the form will be processed?